Beeswax candles have been used for centuries and remain one of the most popular natural candle options today. Compared with paraffin candles made from petroleum byproducts, beeswax is a renewable material produced by honeybees. It burns cleanly, lasts longer, and gives off a light natural honey aroma, making it a preferred choice for home use and handmade candle projects.
This guide explains why beeswax is widely used, what materials are needed, and how to make beeswax candles step by step. It also includes creative variations, troubleshooting tips, and safety guidance.
Why Choose Beeswax for Candle Making
- Longer burn time
Beeswax burns slower than most wax types, which means candles last significantly longer.
- Cleaner combustion
When properly wicked, beeswax produces minimal soot, making it suitable for indoor environments.
- Natural scent
Pure beeswax has a mild honey-like aroma that does not require added fragrance.
- Bright, warm flame
Beeswax candles produce a steady, warm light that enhances indoor atmosphere.
- Renewable material
As a natural byproduct of beekeeping, beeswax is biodegradable and environmentally friendly.
These properties make beeswax a premium material for both beginners and experienced candle makers.
Materials Needed
Basic supplies:
- Beeswax pellets or blocks
- Cotton or hemp wicks
- Heat-resistant containers or jars
- Double boiler setup
- Wick holders or pencils
- Wick stickers or melted wax for fixing wicks
Optional supplies:
- Essential oils for fragrance
- Candle-safe dyes
- Thermometer
- Silicone molds for shaped candles
Beeswax pellets are recommended for beginners due to faster and more even melting.
Step-by-Step Candle Making Process
Step 1: Prepare workspace
Cover surfaces with parchment or protective material. Keep tools organized and ensure proper ventilation.
Step 2: Melt beeswax
Use a double boiler to gently melt beeswax. Stir occasionally until fully liquid. Avoid direct heat to prevent overheating or fire risk.
Step 3: Set wicks
Fix the wick in the center of the container using wax or stickers. Keep it upright with a holder to ensure even burning.
Step 4: Add fragrance or color (optional)
Add essential oils after wax fully melts. Stir gently. Use candle-safe dyes if color is desired. Beeswax naturally has a warm golden tone, so final colors may appear softer.
Step 5: Pour wax
Pour slowly into containers, leaving a small gap at the top. Maintain wick position during pouring.
Step 6: Cool completely
Let candles cool undisturbed at room temperature. Cooling time varies depending on size, usually several hours.
Step 7: Trim wick
Trim wick to about 6 mm before use to ensure stable burning and reduced smoke.
Creative Candle Variations
- Rolled beeswax candles
Beeswax sheets can be rolled around a wick without melting, making this the fastest beginner method.
- Molded candles
Silicone molds allow different shapes such as flowers, stars, or geometric designs.
- Layered candles
Pour wax in stages using different colors to create striped or gradient effects.
- Scent blends
Popular combinations include lavender and vanilla, citrus and mint, or orange and cinnamon.
- Common Problems and Fixes
- Tunneling
Usually caused by a small wick or short initial burn. Ensure full melt pool on first use.
- Uneven burning
Often related to off-center wick placement.
- Weak fragrance
Beeswax holds fragrance lightly; increase essential oil slightly but avoid overloading.
- White surface layer (bloom)
A natural crystallization effect of pure beeswax. It does not affect performance and can be polished off if needed.
Safety Guidelines
During production
Never leave melting wax unattended
Always use a double boiler
Avoid overheating wax
Keep away from children and pets
During use
Keep candles away from flammable materials
Trim wick before each burn
Do not burn candles to the bottom container layer
Place on heat-resistant surfaces
Never leave burning candles unattended
Frequently Asked Questions
Do beeswax candles need fragrance
No. Natural beeswax already has a light scent.
Can beeswax be colored
Yes, using candle-safe dyes, although results appear warmer due to natural wax color.
How long do beeswax candles last
They typically last longer than paraffin or soy candles due to slower burning.
Why does my candle develop a white layer
This is beeswax bloom, a natural characteristic of pure beeswax.
Final Summary
Beeswax candle making is a simple and accessible craft that produces durable, clean-burning candles with a natural aesthetic. With basic tools and proper technique, beginners can easily create functional and decorative candles at home. As experience grows, more advanced designs such as layered colors, molds, and custom scents can be explored for greater variety.
 DIY Beeswax Candles: Complete Beginner Guide
 How Much Silicone Pigment Should Be Added to Silicone?
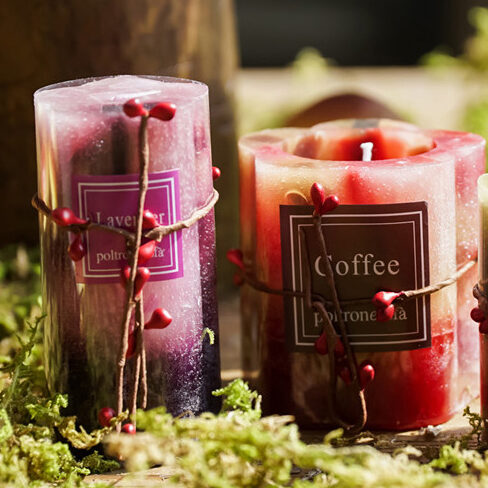 Discover Amazing Candle-Making Colors: Best Hues & Waxes