【Handmade Tutorial】Autumn Limited! Pumpkin Yellow Epoxy Resin Storage Jar DIY Guide
Add a touch of warm pumpkin yellow to your life! Today we’ll create a unique pumpkin-shaped storage jar with epoxy resin, complete with starry glitter effects✨
Beginner-friendly, foolproof recipe – save it now!
———-
📦 Materials List
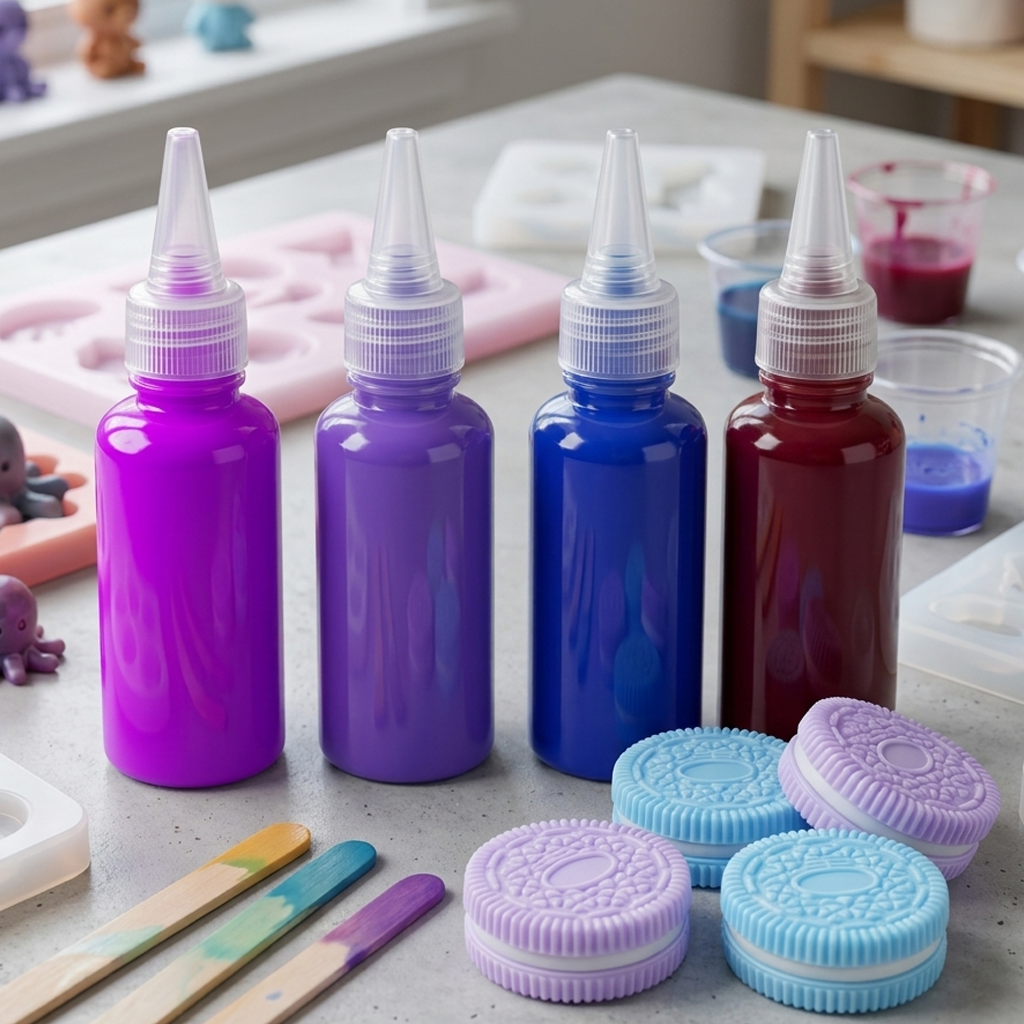
- AB epoxy resin (Total 230g: Part A 115g + Part B 115g)
- Pumpkin yellow pigment (recommend resin-specific color paste)
- Cosmic glitter (gold/amber tones recommended for pumpkin theme)
- Pumpkin-shaped silicone mold (separate jar body and lid molds)
- Digital scale/measuring cups, mixing stick, degassing gun (or lighter)
- Disposable gloves, apron, ventilated workspace
———-
📸 Step-by-Step Tutorial
❶ Precise Resin Mixing
- Measure 115g of Part A resin into a mixing cup, then add 115g of Part B (total weight tolerance ±5g).
❗Important: Use matching brand components to ensure proper curing!*

❷ Z-Shaped Stirring Technique
- Slowly stir in a “Z” pattern along the cup walls for 5-7 minutes until white streaks disappear.
- Ensure the stirrer touches the bottom to prevent surface-only mixing.

❸ Color Customization
- Add pumpkin yellow pigment drop by drop – intensity varies with quantity. Adjust to preference.

❹ Glitter Infusion
- Sprinkle 0.5g fine glitter (excess reduces transparency). Mix gently using figure-8 motions.

❺ Bubble Removal
- Standard method*: Let sit 15 mins for natural bubble rise and burst.
- Quick method*: Place cup in 40°C water bath for 2 mins, then use heat gun/lighter on surface.
🔥 Flame method: Keep 10cm above resin and sweep quickly to avoid scorching!*

❻ Precision Pouring
- Fill jar body mold to 90% first, then pour remaining resin into lid mold.
- Use a bamboo skewer to guide resin into detailed areas (e.g., pumpkin ridges).
- Tap mold 3-5 times after pouring to release trapped bubbles.

❼ Curing Magic
- Cure at 25°C for 8-12 hours (extend to 24hrs in cooler environments).
- Test cure: Gently touch hidden area with cotton swab – no stringing means ready to demold.
- Post-demolding: Allow 24hrs secondary curing for full hardness.


💫 Tag us in your creations! For more autumn crafts, check our bio link~