Creating a private label DIY resin kit involves more than printing your logo on a product. From selecting resin and silicone molds to designing packaging, every decision affects the customer experience, production cost, and market positioning of your final product.
For brands, wholesalers, and retailers, the customization process can be divided into six main steps: defining the product concept, selecting kit components, customizing packaging, confirming specifications, testing samples, and starting bulk production.
This guide explains how to turn your resin craft kit idea into a market-ready product.
Step 1: Define Your Product Concept
Before selecting materials or designing packaging, decide what you want your customers to create with the kit.
A resin jewelry kit designed for beginners will require different materials and accessories from a coaster-making kit or a decorative resin art set.
Some popular product concepts include:
- UV resin jewelry making kits
- Resin keychain making kits
- Dried flower resin craft kits
- Epoxy resin coaster kits
- DIY resin gift sets
Your target customers and sales channels should also influence the product design. A beginner-friendly kit should focus on simple projects and clear instructions, while a premium craft kit may offer more creative possibilities through specialized molds and decorative materials.
At this stage, having a clear product concept and target retail price will help guide the remaining customization decisions.
Step 2: Build Your DIY Resin Kit Configuration
Once the product concept is established, the next step is to select the materials and accessories needed to complete the intended craft projects.
Start with the resin type. UV resin is commonly used for smaller projects such as jewelry, pendants, and charms, while two-part epoxy resin is often used for larger projects such as coasters and decorative pieces.
The molds, pigments, decorations, and tools should then be selected around the specific application.
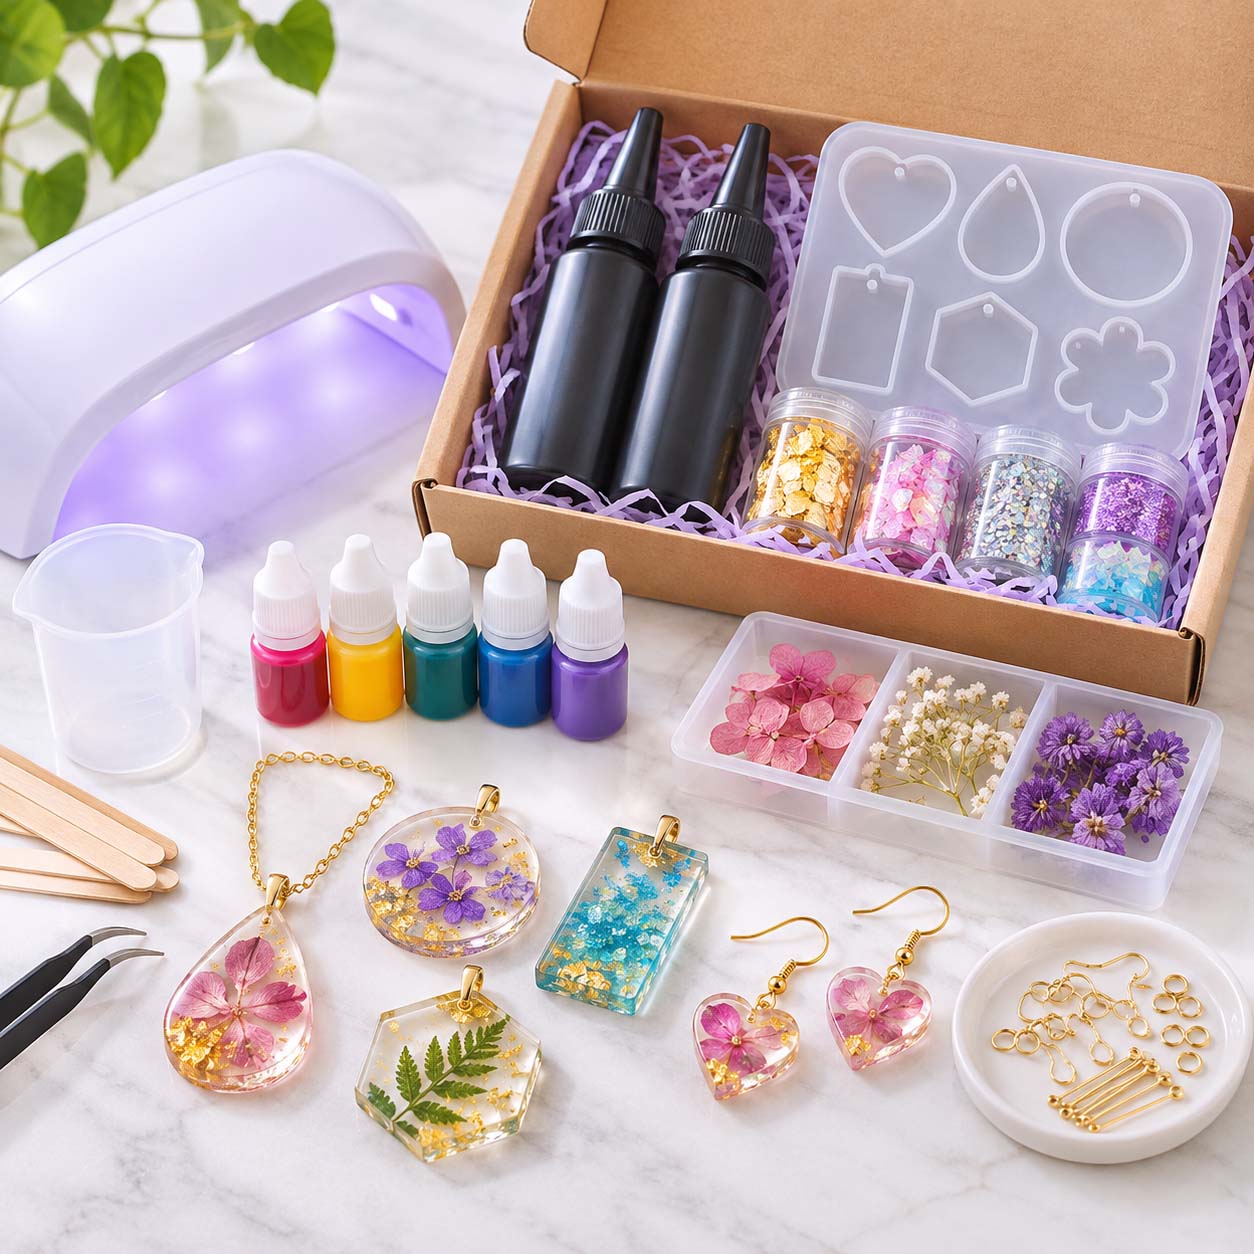
Example: A Private Label UV Resin Jewelry Kit
The following is an illustrative configuration for a beginner-friendly jewelry making kit.
| Kit Component |
Example Configuration |
Purpose |
| UV resin |
Clear UV resin |
Main crafting material |
| Silicone molds |
Pendant and earring molds |
Creating jewelry shapes |
| Pigments |
Liquid colorants |
Adding color |
| Decorations |
Dried flowers and glitter |
Personalizing designs |
| Jewelry findings |
Earring hooks and jump rings |
Assembling finished jewelry |
| Craft tools |
Tweezers and stirring sticks |
Handling materials |
| UV lamp |
Compatible curing lamp |
Curing the resin |
| Safety supplies |
Suitable protective gloves |
Supporting safe handling |
| Instructions |
Step-by-step project guide |
Guiding beginners |
A practical way to develop a resin kit is to work backward from the finished craft project. If customers are expected to create earrings, for example, the kit should contain not only the resin and molds but also the necessary jewelry findings for final assembly.
This approach helps avoid missing components and unnecessary accessories while keeping the kit focused on its intended purpose.
Step 3: Customize Your Branding and Packaging
Packaging is an important part of private label development because it connects the product with your brand identity.
Depending on the customization requirements, branding can be applied to the outer box, resin bottle labels, instruction manuals, and other printed materials inside the kit.
Brands can consider several packaging options:
- Existing packaging with a custom logo or sticker
- Fully customized printed retail boxes
- Branded resin bottle labels
- Customized instruction manuals and inserts
The packaging format should also suit the intended sales channel.
For retail stores, product images, packaging appearance, and shelf presentation are particularly important. For e-commerce, compact packaging and secure component placement may be higher priorities.
Since resin kits contain liquids and multiple small accessories, the internal packaging should keep bottles, molds, tools, and decorations organized and protected during transportation.
Required safety information and labeling should also be considered during packaging development rather than added after the design is completed.
Step 4: Confirm Product Specifications, MOQ and Pricing
With the kit configuration and packaging direction established, you can prepare your requirements for a supplier quotation.
A useful customization brief should include:
- Product concept and target market
- Preferred resin type and quantity
- Required molds, tools, and accessories
- Packaging and branding requirements
- Estimated order quantity
- Target purchasing price, if available
The minimum order quantity (MOQ) for a private label resin kit depends on the customization requirements.
For example, using existing molds and accessories with branded packaging may involve different production requirements from developing a completely new silicone mold or customized bottle.
If you are launching a new product, starting with existing components and customized branding can help limit initial development costs. More specialized components can be introduced as the product line develops.
Providing clear specifications also helps the supplier prepare a more accurate quotation and identify potential adjustments before sampling begins.
For more information about evaluating suppliers, read our guide on how to choose a DIY resin kit supplier for wholesale and private label business.
Step 5: Develop and Test Your Sample
A physical sample allows you to evaluate whether the selected components work together as a complete product.
Rather than simply checking the appearance of the kit, test it by following the intended crafting process from beginning to end.
For a UV resin jewelry kit, this may involve filling the silicone molds, adding pigments or dried flowers, curing the resin with the appropriate lamp, removing the finished pieces, and attaching the jewelry accessories.
During testing, pay particular attention to:
- Resin curing performance and finished appearance
- Compatibility between resin, molds, pigments, and curing equipment
- Whether material quantities are sufficient for the advertised projects
- Ease of use and clarity of instructions
- Packaging quality and component arrangement
Follow the resin manufacturer’s handling and curing instructions throughout the testing process.
If a problem is identified, the sample configuration can be revised before bulk production. For example, a mold may need to be replaced, the resin quantity increased, or an instruction step clarified.
The objective is to make sure the kit delivers the crafting experience promised on its packaging.
Step 6: Approve the Final Product and Start Bulk Production
Once sample testing is complete, confirm the final product specification and packaging artwork with your supplier.
The approved specification should serve as the reference for bulk production, covering the exact components, quantities, colors, packaging, and printed materials.
Before production begins, buyers should also confirm the production schedule, quality inspection requirements, shipping arrangements, and applicable product safety documentation for their target market.
If changes have been made during sampling, make sure they are reflected in the final specification.
Keeping an approved sample and written component list can also help maintain product consistency when placing future orders.
Frequently Asked Questions
Can I customize a resin kit without developing new molds?
Yes. Brands can use existing silicone molds and accessories while creating a unique product through customized component combinations, colors, packaging, and branding. This can reduce the need for new mold development.
Can I start a private label project with only a product idea?
Yes. A product reference, intended craft project, target customer, and estimated order quantity can provide a starting point for developing a suitable kit configuration with your supplier.
Can I develop several resin kits under the same brand?
Yes. Brands can develop a coordinated product range by using a consistent packaging style while changing the molds, decorations, resin quantities, and accessories for different craft projects.
For example, a jewelry kit, keychain kit, and coaster kit can be positioned as separate products within the same resin craft collection.
Develop Your Private Label Resin Kit with DIY RESINS
A successful private label DIY resin kit starts with a clear product concept and a carefully selected combination of materials, accessories, and packaging.
At DIY RESINS, we provide customized resin kit solutions for brands, wholesalers, retailers, and e-commerce businesses, with OEM and ODM customization options to support different product development needs.
Whether you want to customize an existing resin kit or develop a new product concept for your brand, we can help you explore suitable component combinations and packaging options.
Contact us to discuss your private label DIY resin kit project. Share your product idea, target market, customization requirements, and estimated order quantity to get started.
 How to Customize a Private Label DIY Resin Kit: A Step-by-Step Guide for Brands
 How to Choose a DIY Resin Kit Supplier for Wholesale and Private Label Business
 How to Choose the Right Colorant for Resin